Showing posts with label MySQL for Windows. Show all posts

Tuesday, 13 December 2011

MySQL BLACKHOLE Engine (again)

My previous post about this was run on a MySQL installation on UNIX. I decided to have another go using the MySQL on my home PC, which is installed on Windows XP. First I had a look for the have_blackhole_engine variable but I could not find it:
  
mysql> SHOW VARIABLES LIKE 'have_blackhole_engine';
Empty set (0.00 sec)

mysql>


But I decided to carry on and created a table using the BLACKHOLE engine:

mysql> use test
Database changed
mysql> create table andrew (col1 varchar(10));
Query OK, 0 rows affected (0.41 sec)

mysql> alter table andrew engine = blackhole;
Query OK, 0 rows affected (0.17 sec)
Records: 0  Duplicates: 0  Warnings: 0

mysql>

Then I inserted a row into the table and looked for it but it had gone so this time it had worked as expected:

mysql> insert into andrew values ('Fred');
Query OK, 1 row affected (0.00 sec)

mysql> select * from andrew;
Empty set (0.00 sec)

mysql>

Saturday, 10 December 2011

Creating a MySQL Database on Windows XP

In the example below, the show databases command is used to display the names of databases which already exist. The create database command is then used to create a database called andrew. The show databases command is run again and database andrew appears in the list. Next, the drop database command is used to drop a database called ANDREW, showing that in Windows, MySQL database names are not case sensitive. Finally, the show databases command is run again to show that the database has gone:
  
mysql> show databases;
+--------------------+
| Database           |
+--------------------+
| information_schema |
| mysql              |
| performance_schema |
| sakila             |
| test               |
| world              |
+--------------------+
6 rows in set (0.05 sec)

mysql> create database andrew;
Query OK, 1 row affected (0.00 sec)

mysql> show databases;
+--------------------+
| Database           |
+--------------------+
| information_schema |
| andrew             |
| mysql              |
| performance_schema |
| sakila             |
| test               |
| world              |
+--------------------+
7 rows in set (0.01 sec)

mysql> drop database ANDREW;
Query OK, 0 rows affected (0.01 sec)

mysql> show databases;
+--------------------+
| Database           |
+--------------------+
| information_schema |
| mysql              |
| performance_schema |
| sakila             |
| test               |
| world              |
+--------------------+
6 rows in set (0.00 sec)

mysql>

Introduction to MySQL

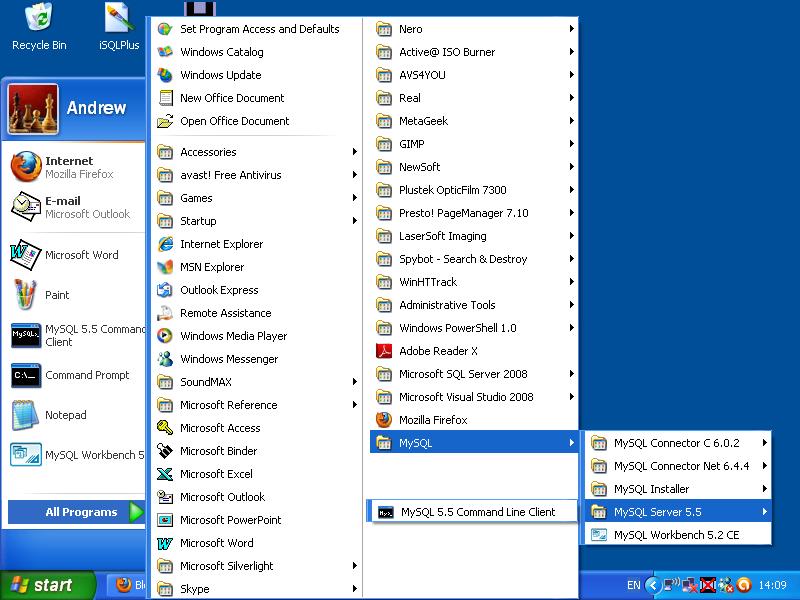
I accessed the MySQL web site yesterday and downloaded MySQL for Windows (I have XP SP3 on my PC). The download is just over 200 megabytes so it didn't take too long. I tried to install it but the installer told me I needed to have .NET Framework 4.0. It displayed a URL to go to on the Microsoft web site so I went there. I'm not sure what .NET Framework 4.0 will give me but it installed in a few minutes. Then I tried to install MySQL again and that only took a short time as well so now I am ready to go. On my Start Menu there is a My SQL 5.5 Command Line Client (click the image to display it at full size):


A screen flashes up then disappears when I click it. I will try to find out why in due course. There is also a MySQL Workbench:


For now, I just need a command line interface so I started up a DOS session and logged in and out as follows:

C:\Program Files\MySQL\MySQL Server 5.5\bin>mysql -u root -p
Enter password: *********
Welcome to the MySQL monitor.  Commands end with ; or \g.
Your MySQL connection id is 6
Server version: 5.5.19 MySQL Community Server (GPL)

Copyright (c) 2000, 2011, Oracle and/or its affiliates. All rights reserved.

Oracle is a registered trademark of Oracle Corporation and/or its
affiliates. Other names may be trademarks of their respective
owners.

Type 'help;' or '\h' for help. Type '\c' to clear the current input statement.

mysql> quit
Bye


The root password was the one I specified when I installed MySQL. The next few blog posts will be run in a session accessed like this.